Keeping your lawn healthy in Texas is no easy task when the summers can dry out even the hardiest grass. Most people think watering more will solve the problem but waste builds up quickly and repairs often go unnoticed. Neglected irrigation systems can waste up to thousands of gallons a year without you even realizing it. Surprisingly, the smallest maintenance steps often bring the biggest results. The real secret to a lush landscape is not just watering but mastering a few simple habits that can save resources and money in the long run.
Table of Contents
- Step 1: Inspect Your Irrigation System For Damage
- Step 2: Clean Filters And Sprinkler Heads Regularly
- Step 3: Adjust Timing And Watering Schedule As Needed
- Step 4: Test Water Pressure And Flow Rate
- Step 5: Monitor Plants And Soil Moisture Levels
- Step 6: Document Maintenance Activities And Issues
Quick Summary
| Key Point | Explanation |
|---|---|
| 1. Inspect your irrigation system regularly | A systematic inspection helps catch damage before it leads to costly repairs or water loss. |
| 2. Clean filters and sprinkler heads biannually | Regular cleaning prevents clogs, ensuring even water distribution and extending system lifespan. |
| 3. Adjust watering schedules based on conditions | Tailor your watering times and frequency according to seasonal changes and plant needs for efficiency. |
| 4. Test water pressure and flow rates routinely | Monitoring these factors helps identify performance issues, ensuring effective irrigation coverage. |
| 5. Document maintenance activities consistently | Keeping track of maintenance actions assists in diagnosing problems and planning future improvements efficiently. |
Step 1: Inspect Your Irrigation System for Damage
Understanding the health of your irrigation system is the crucial first step in maintaining optimal water efficiency. A comprehensive inspection allows you to catch potential problems before they escalate into costly repairs or significant water waste. Effective system inspection involves a systematic approach that examines every component of your sprinkler network.
Begin by walking your entire lawn and visually examining each sprinkler head and connection point. Look for obvious signs of damage such as cracked casings, misaligned heads, or areas where water pools unexpectedly. Pay special attention to zones near walkways, driveways, and high traffic areas where mechanical damage is more likely to occur. Learn more about identifying sprinkler system issues to help you spot potential problems early.
Part of a thorough inspection involves running your system through a complete cycle and observing its performance. Watch for irregular spray patterns, heads that don’t rotate correctly, or sections that seem to receive too little or too much water. These inconsistencies can indicate underlying problems with water pressure, head alignment, or potential underground pipe damage.
Some key indicators to watch for include:
- Uneven grass color or dry patches
- Water spraying onto sidewalks or streets
- Heads that are stuck or tilted at unusual angles
- Unusual gurgling or hissing sounds during operation
If you discover any of these issues, carefully document their location and specific characteristics. This information will be invaluable when troubleshooting or communicating with a professional irrigation specialist. Remember that early detection can save significant money and prevent more extensive damage to your landscaping and irrigation infrastructure.
Here is a troubleshooting table to help you quickly identify common irrigation system problems, their possible causes, and solutions based on issues discussed in the article.
| Problem | Possible Cause | Solution |
|---|---|---|
| Uneven grass color or dry patches | Low pressure, clogged head | Check for leaks, clean or replace head |
| Water spraying onto hard surfaces | Misaligned or tilted sprinkler | Realign or reset sprinkler head |
| Sprinkler head not rotating | Debris, mechanical damage | Clean head or replace damaged parts |
| Unusual gurgling or hissing sounds | Leak, high/low pressure | Inspect pipes and adjust pressure |
| Standing water after irrigation | Poor drainage, overwatering | Adjust watering schedule, improve drainage |
For homeowners without extensive technical experience, consider scheduling a professional inspection at least once annually. An expert can identify subtle issues that might escape an untrained eye and provide recommendations for maintaining your system’s peak performance.
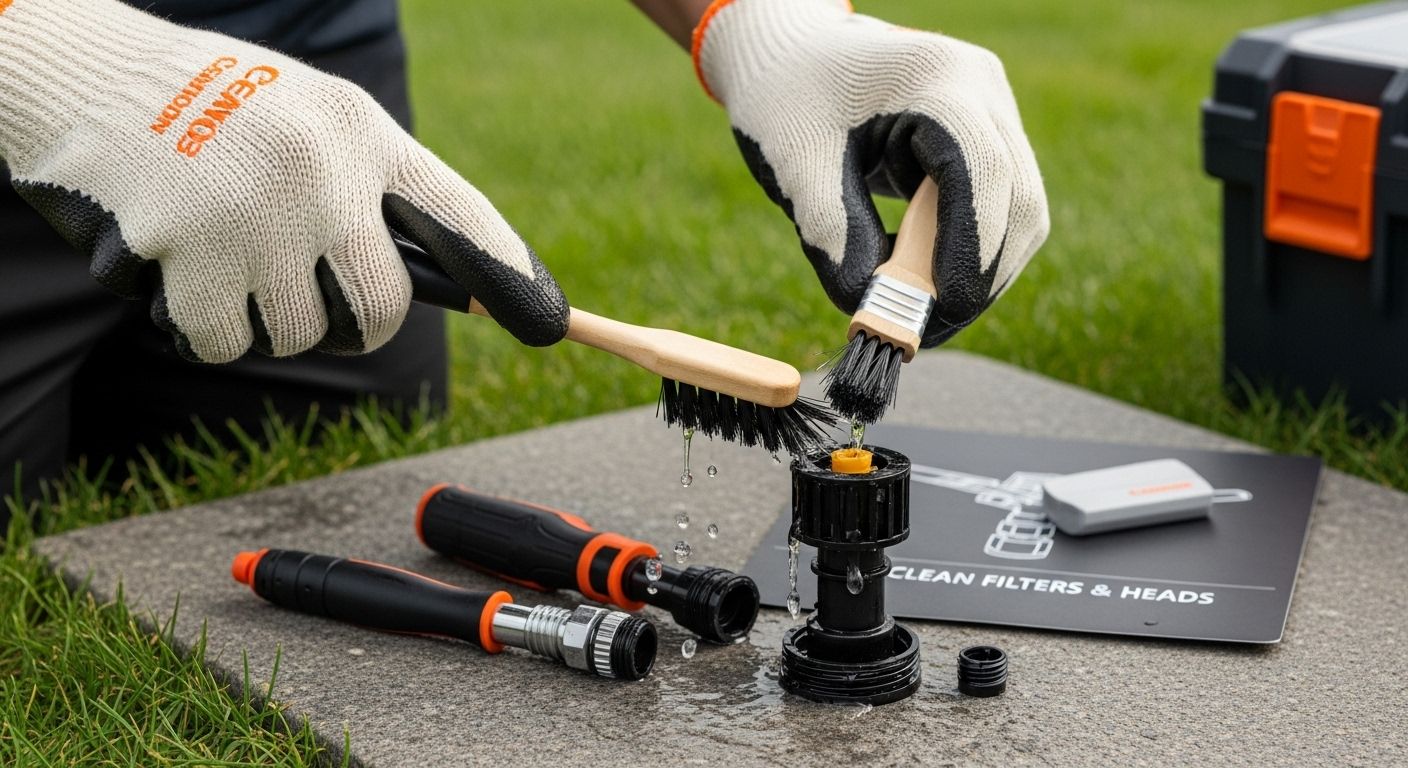
Step 2: Clean Filters and Sprinkler Heads Regularly
Regular cleaning of your irrigation system’s filters and sprinkler heads is critical to maintaining peak performance and preventing water waste. Dirt, debris, and mineral buildup can significantly reduce your system’s efficiency, causing uneven water distribution and potential long term damage. This maintenance step ensures your landscape receives consistent, precise watering while extending the overall lifespan of your irrigation infrastructure.
To begin the cleaning process, gather basic tools including a small brush, soft cloth, pliers, and a bucket of clean water. Start by carefully removing each sprinkler head from its housing, paying close attention to how it was originally positioned. Discover essential tips for sprinkler head maintenance to ensure proper handling. Gently disassemble the head, examining each component for mineral deposits, small rocks, or accumulated sediment that might obstruct water flow. Use your soft brush to carefully clean internal mechanisms, being careful not to damage delicate moving parts.
Filter cleaning requires equal attention and precision.
The following table organizes the basic tools and their purposes for cleaning sprinkler heads and filters, providing a handy reference before starting your maintenance.
| Tool | Purpose |
|---|---|
| Small brush | Remove dirt and mineral buildup from heads |
| Soft cloth | Wipe components and remove residual debris |
| Pliers | Loosen or tighten sprinkler head components |
| Bucket of water | Soak and rinse parts during cleaning |
| Mild solution | Dissolve stubborn mineral deposits (if needed) |
After cleaning, reassemble each sprinkler head carefully, ensuring all components are securely fastened and aligned correctly. Some key verification points include:
- Smooth rotation of sprinkler heads
- Consistent spray pattern without obstruction
- No visible debris or blockages
- Proper alignment with intended watering zones
Perform this maintenance routine at least twice annually spring and fall to keep your irrigation system operating at maximum efficiency. By dedicating time to these detailed cleaning steps, you protect your landscape investment and conserve water resources.
Below is a checklist table summarizing the key verification points for ensuring your irrigation system remains efficient after cleaning, inspecting, or making adjustments.
| Verification Point | What to Check |
|---|---|
| Even spray pattern | Water is distributed uniformly without blockage |
| Proper head alignment | Sprinkler heads point and rotate as intended |
| No visible leaks or pooling | No excess water pooling or leaking around heads |
| Working filter | Filter is free of buildup and functions properly |
| Consistent pressure and flow | No sudden drops or surges in spray |
| No obstructions in components | All heads and lines are clear of debris |
| Healthy lawn appearance | No dry patches or overwatered areas |
Step 3: Adjust Timing and Watering Schedule as Needed
Optimizing your irrigation system’s timing and schedule is crucial for maintaining a healthy landscape while conserving water resources. Watering at the right time and frequency prevents overwatering, reduces water waste, and promotes stronger root development. The key is understanding your specific landscape’s unique needs and adapting your irrigation strategy accordingly.
Begin by considering the seasonal variations and local climate conditions. Texas summers demand different watering approaches compared to milder spring or fall months. Explore our comprehensive DFW watering guide to understand regional nuances. Early morning remains the optimal time for irrigation, typically between 4 and 10 AM, when temperatures are cooler and wind is minimal. This timing reduces water loss through evaporation and allows grass and plants to absorb moisture effectively before the day’s heat sets in.
Evaluate your current irrigation controller settings with a critical eye. Most homeowners set their systems on a fixed schedule and forget about adjustments, which can lead to significant water inefficiencies. Instead, program your system to account for rainfall, temperature changes, and specific plant zone requirements. Smart irrigation controllers can automatically adjust watering based on real time weather data, but for traditional systems, manual intervention is necessary. Consider reducing watering frequency during rainy periods and increasing during extended dry spells. Your lawn’s appearance provides valuable signals about water needs look for subtle color changes or slight wilting as indicators that adjustments might be required.
Some critical points to remember when fine tuning your watering schedule include:
- Water deeply but less frequently to encourage deeper root growth
- Adjust watering duration based on soil type and plant species
- Account for microclimates within your landscape different areas may require varied watering approaches
- Monitor and respond to local weather patterns
Successful schedule management means being observant and willing to make incremental changes. By paying attention to your landscape’s response and remaining flexible, you can create a water efficient irrigation strategy that keeps your lawn healthy while minimizing unnecessary water consumption.
Step 4: Test Water Pressure and Flow Rate
Testing water pressure and flow rate is a critical diagnostic step in maintaining an efficient irrigation system. Improper water pressure can lead to significant performance issues, including uneven watering, system damage, and increased water waste. Understanding how water moves through your system helps identify potential problems before they become costly repairs.
To begin your assessment, you’ll need a few basic tools: a pressure gauge, a flow meter, and potentially a water flow measuring device. Locate your main water connection and primary irrigation valve to start the testing process. Learn more about proper pipe sizing and flow measurements to ensure accurate readings. Attach the pressure gauge directly to an outdoor faucet or the irrigation system’s main valve. Standard residential systems typically operate best between 40 and 80 pounds per square inch (PSI). Readings outside this range indicate potential problems that require immediate attention.
Flow rate testing provides additional insights into your system’s performance. This measurement determines how many gallons per minute your system can effectively distribute. Most residential irrigation systems require between 10 and 15 gallons per minute to function optimally. During your test, run each irrigation zone separately and measure the time it takes to fill a five gallon bucket. This simple method allows you to calculate the precise flow rate for each zone. Pay close attention to variations between different areas of your landscape, as inconsistent flow can result in uneven watering and potential plant stress.
Key verification points for your pressure and flow rate test include:
- Consistent pressure across all irrigation zones
- Flow rates matching your system’s design specifications
- No sudden drops in pressure during system operation
- Even water distribution without significant variations
If your measurements reveal significant discrepancies, consider consulting a professional irrigation specialist. They can provide detailed diagnostics and recommend specific adjustments to restore your system’s optimal performance. Remember that regular testing is not just about maintaining efficiency it’s about protecting your landscape investment and conserving water resources.
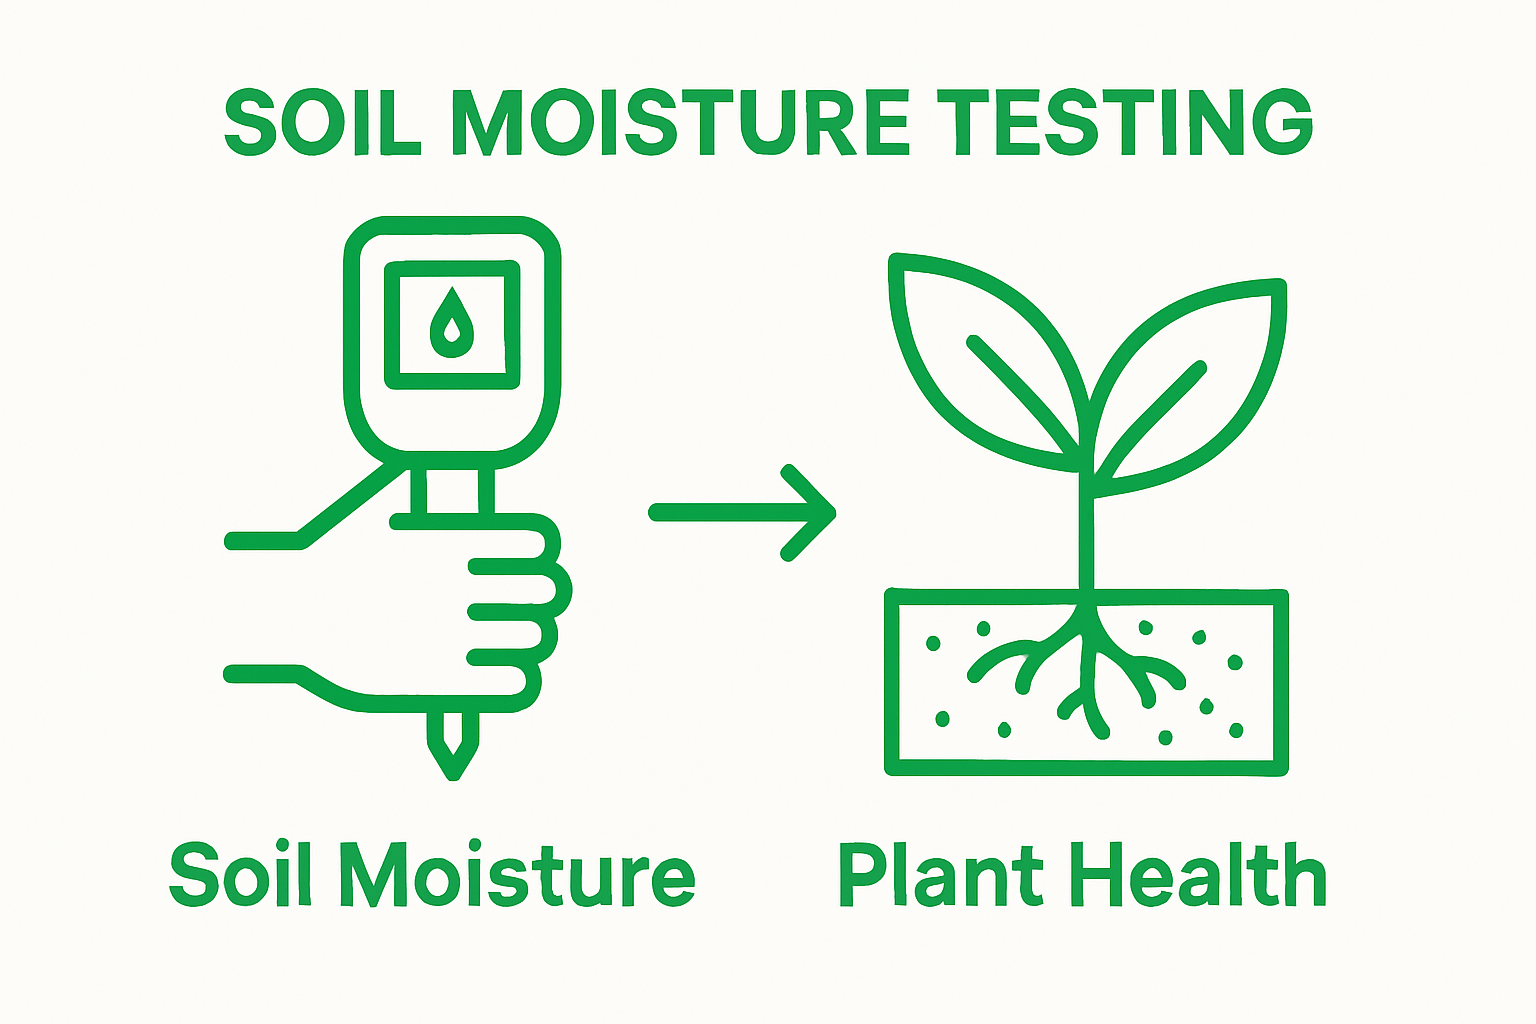
Step 5: Monitor Plants and Soil Moisture Levels
Monitoring plants and soil moisture levels is the most nuanced yet critical step in maintaining an efficient irrigation system. Understanding your landscape’s unique hydration needs goes far beyond simple watering schedules. This step requires careful observation, strategic testing, and a willingness to adapt your irrigation approach based on real time landscape conditions.
Begin by acquiring a reliable soil moisture meter, which will become your primary diagnostic tool. These devices provide precise readings of moisture content at various soil depths, allowing you to make informed watering decisions. Explore our comprehensive guide to understanding soil moisture to enhance your landscape management skills. Insert the probe at multiple locations throughout your landscape, taking readings in different zones to account for variations in soil composition, sun exposure, and plant types. Pay special attention to areas near structures, under trees, and in regions with different ground cover, as these microclimates can have dramatically different moisture retention characteristics.
Visual plant indicators provide additional insights into soil moisture levels. Look for subtle signs of water stress such as slight leaf wilting, color changes, or reduced growth rates. These early warning signals can help you adjust your irrigation strategy before significant damage occurs. Different plant species have unique water requirements, so familiarize yourself with the specific needs of your landscape’s vegetation.
 Native plants and drought resistant species typically require less frequent watering and can tolerate slightly drier conditions compared to more water intensive ornamental plants.
Key verification points for effective moisture monitoring include:
- Consistent soil moisture readings across different landscape zones
- No signs of water stress in plant foliage
- Proper drainage with no standing water after irrigation
- Healthy root zone moisture without excessive saturation
Remember that effective moisture monitoring is an ongoing process. Seasonal changes, temperature fluctuations, and landscape growth will continuously modify your irrigation needs. By developing a keen observational approach and using technology like moisture meters, you can create a responsive, efficient irrigation strategy that keeps your landscape thriving while conserving water resources.
Step 6: Document Maintenance Activities and Issues
Documenting your irrigation system’s maintenance activities transforms routine care from a reactive task to a strategic management approach. Detailed record keeping provides invaluable insights into your system’s performance, helping you predict potential issues and make informed maintenance decisions. Think of your documentation as a comprehensive health record for your landscape’s irrigation infrastructure.
Establish a dedicated digital or physical maintenance log that tracks every interaction with your irrigation system. This record should include dates of inspections, repairs, cleaning activities, and any observed irregularities. Learn more about creating an effective maintenance tracking system to streamline your documentation process. Use a consistent format that captures critical details such as zone performance, water pressure readings, flow rate measurements, and specific component conditions. Digital spreadsheets or specialized irrigation management apps can simplify this process, allowing you to create timestamps, attach photos, and generate historical performance reports with ease.
Your documentation should go beyond simple checklist entries. Include contextual information that provides deeper understanding of your system’s behavior. Note environmental conditions during maintenance activities, such as recent weather patterns, temperature, and rainfall. Record the specific actions taken during each maintenance session, including which components were cleaned, adjusted, or replaced. Pay special attention to documenting any recurring issues, as these patterns can reveal underlying system weaknesses or design limitations that might require more comprehensive solutions. Photographs can be particularly helpful, providing visual evidence of system conditions and allowing you to track changes over time.
Key elements to include in your maintenance documentation:
- Date and time of each maintenance activity
- Specific zones or components inspected
- Measurements of water pressure and flow rate
- Observed issues or potential problems
- Repairs or adjustments made
- Environmental conditions during maintenance
Consistent documentation transforms your irrigation maintenance from a sporadic chore into a systematic approach. By maintaining a comprehensive record, you create a valuable resource that not only helps you manage your current system more effectively but also provides critical information for future maintenance, potential system upgrades, or professional consultations.
Tired of Irrigation Issues Draining Your Time and Money?
Mastering irrigation maintenance is not easy on your own. This article highlights the importance of spotting leaks, cleaning sprinkler heads, and fine-tuning your watering schedule. But even with these smart strategies, small system faults or missed inspections can cause dry patches, wasted water, or higher bills. Detailed tasks like checking water pressure and managing soil moisture can feel overwhelming for many homeowners. If you want to go beyond DIY tips and achieve real results, let a trusted professional step in. Discover more actionable advice in our Guides – Lawn and Sprinkler Systems section and turn your maintenance efforts into success.
Stop letting hidden problems lower your yard’s potential. Contact the local DFW experts for a complete sprinkler checkup and tailored lawn solutions. Visit Lawn Sense today for fast scheduling and personalized support. Choose professional care to prevent costly repairs, protect your landscape, and secure long-term efficiency.
Frequently Asked Questions
How often should I inspect my irrigation system for damage?
Regular inspections should be conducted at least once a year to catch potential problems early. However, visual checks should be done more frequently, especially after extreme weather conditions.
What tools do I need to clean sprinkler heads and filters?
You’ll need a small brush, a soft cloth, pliers, and a bucket of clean water to clean your sprinkler heads and filters effectively.
How can I adjust my irrigation timing and schedule?
To optimize your irrigation schedule, consider seasonal variations, local climate conditions, and specific plant needs. Adjust the duration and frequency based on these factors to prevent overwatering.
What should I do if my water pressure is too high or too low?
If your water pressure readings are outside the ideal range of 40-80 PSI, consult a professional irrigation specialist. They can diagnose the issue and recommend necessary adjustments to restore optimal performance.